Brought to you by Prowlerexcitement.com
with permission of Dean@ProwlerPro.com.
PROWLER PRO TRANSFER GEAR SET

Stock Final Drive Ratio 2.68
Prowler Pro Final Drive Ratio
3.42
Many of the parts in this kit are patented and any unauthorized
duplication will be prosecuted to the full extent of the law. ã2001
Prowler Pro LLC
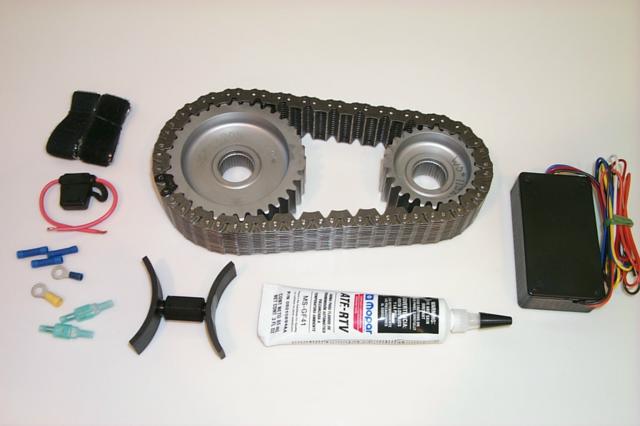
PARTS LIST:
(1)Transmission Out Sprocket
(1) Differential Drive Sprocket
(1) Hyvo Chainset
(1) Speedometer signal converter box
(1) Sprocket Spreader Tool
(1)Mopar RTV gasket tube
(2) Wire connectors (male)
(2)Wire connectors (female)
(3)blue wire connectors
(1) yellow round connector
(1)Inline fuse holder with fuse (3 amp)
(2)6 in Velcro strips
You will need to provide 2 quarts of Automatic Transmission Fluid
Use only Mopar ATF + 3or 4 depending on your year.
These instructions are provided as an overview, please refer to a
Chrysler Corporation Factory Service manual for your specific application.
Factory Transfer Gear Removal:
-
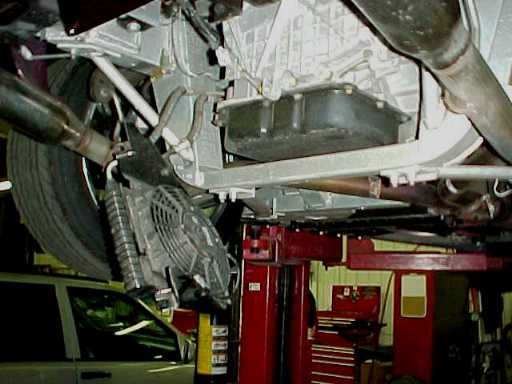
Place car on an appropriate hoist.
-
Remove transaxle cooling fan bolts. (4) bolts 13mm on frame
-
Unplug factory electrical plug in connector.
-
Remove transaxle cooling fan as an assembly.
-
Support transaxle to aid in transaxle mount removal. (use a small piece
of wood for contact area)
-
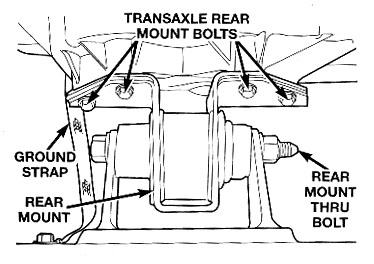
Remove transaxle mount insulator bolt and nut. (1) 18mm.
-
Remove transaxle mount bolts from transfer gear cover. (4) 15mm.
-
Remove electrical ground strap bolt from transfer gear cover. (1) 15mm.
-
Remove transaxle cover bolts. (12) 13mm.
-
Position a drain pan under transfer cover to collect ATF. (approx 2 quarts)
-
Remove transaxle cover, be careful not to apply excessive force.
(approximately 2 quarts of transmission fluid will drain)
-
Remove shaft snap rings and wave washers.
-
Remove transfer gears and chain.
-
Leave factory spacer on output shaft. (left facing rear of car)
-
Clean transfer gear cover gasket surface thoroughly.
Prowler Pro Transfer Gear Installation.
-
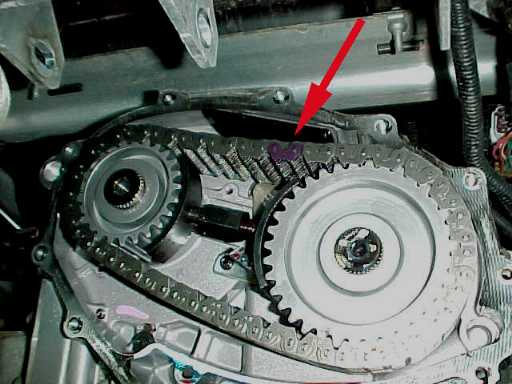
Position new transfer gears with chain on shafts (Dark blue link must face
outward) using the provided spreader tool. / use caution not to apply excessive
pressure.
-
Remove spreader tool.
-
Install wave washers (feet toward front of car)
-
Install snap rings.
-
Apply RTV to surface and install cover bolts. (12) 13mm [250
IN LBS]
-
Install transaxle mount, first (4) bolts 15 mm [45
FT LB] then 18mm bolt and nut [65 FT LB].
-
Attach ground strap and bolt. (1) 15mm [45 FT LB]
-
Install cooling fan assembly. (4) 13mm [250 IN LB]
-
Reconnect cooling fan electrical plug in.
-
Lower vehicle.
-
Add 1.5 quarts transmission (Use only only Mopar ATF + 3 type 7176) fluid
then check and fill to the appropriate level. Refer to your owners manual
for the correct procedure.
Speedometer Signal Converter Installation:
This box comes precalibrated by Prowler Pro.
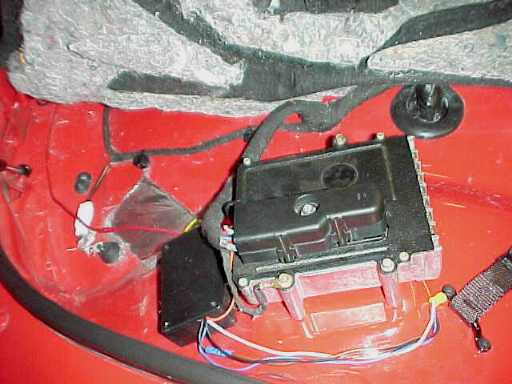
-
Remove the positive battery post.
-
The converter box can be mounted just behind the
-
Transmission Control Module (TCM) under the carpet. (Velcro)
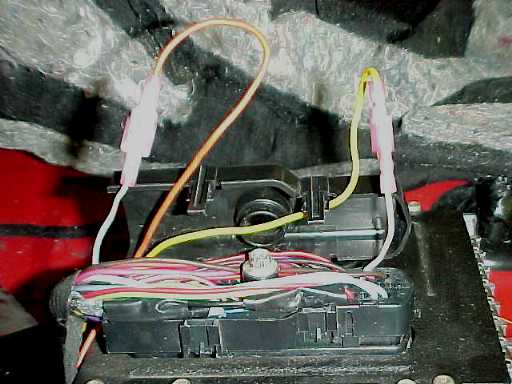
-
Open the cover of the TCM - Locate the white/orange wire (cavity # 58)
Cut it in the middle of the cover then you can hide the wires under the
TCM cover.
-
Wire according to the included diagram. (Page 7)
Suggestion: For switched Ignition feed go directly to the fusebox,
then behind kickpanel - under door sill to the trunk.
There are no warranties implied or otherwise stated, installation
is at owners risk. However, I have accumulated over 20,000 punishing miles
on my own Nitrous Oxide equipped car.
If you have any technical questions please call 970 260 2411.
If you have any comments to improve this instruction sheet please email
us at: 400hp@prowlerpro.com
Thank You for your business.
ã 2000-2001 Prowler
Pro LLC
Dean Prodromides
Prowl On!
Home